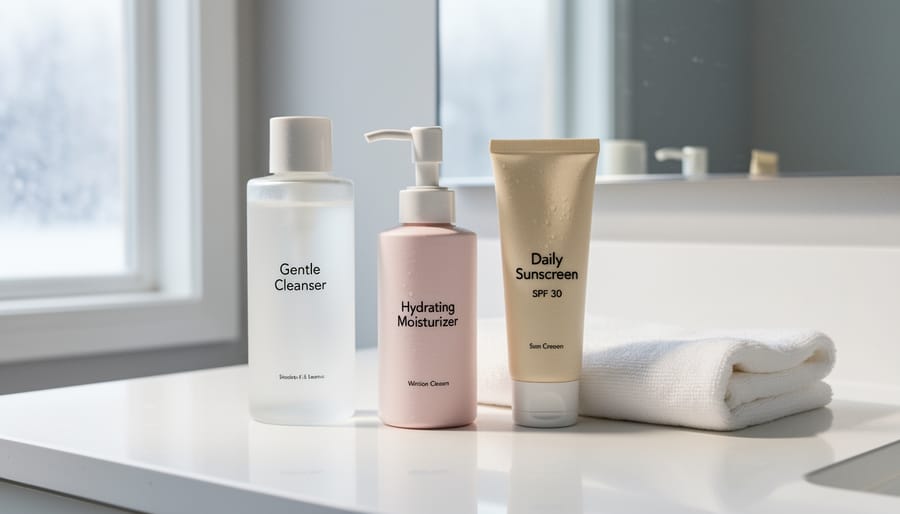
Starting a skincare routine requires just three essential steps: cleanse, moisturize, and protect with SPF. That’s it. You can build an effective routine in about two minutes each morning and evening with these basics, then expand gradually as you learn what your skin needs.
I remember standing in the skincare aisle six years ago, completely paralyzed by choices. Ten-step routines flooded my social media feed, and every influencer seemed to swear by different miracle products. The truth? Most beginners abandon complicated routines within weeks because they’re exhausting and expensive. The skincare routine that works is the one you’ll actually stick with.
Your skin has one primary job: acting as a barrier between your body and the outside world. A good routine supports that function by removing daily buildup (cleanser), maintaining hydration (moisturizer), and preventing damage (sunscreen). Everything else, from serums to masks, is optional enhancement.
Right now, as we head into the colder months, you might notice your skin behaving differently than it did a few weeks ago. That’s completely normal. While summer routines focus heavily on oil control and sun protection, a winter skincare routine typically needs more hydration and barrier support. But the core structure stays the same.
This guide walks you through exactly what to buy, how to use it, and when you should see results. No overwhelming product lists, no guilt about skipping steps, just a straightforward path to healthier skin that fits into real life.
What You’ll Need: Essential Products and Tools
Starting a skincare routine doesn’t require an entire bathroom counter full of products. When I first got into skincare, I made the classic mistake of buying everything at once, fifteen different bottles and jars that overwhelmed me so much I barely used any of them. The truth is, you can build an effective routine with just three core products.
Here’s what every beginner actually needs:
- Cleanser: A gentle face wash that removes dirt, oil, and makeup without stripping your skin
- Moisturizer: A hydrating cream or lotion that keeps skin soft and supports your skin barrier
- Sunscreen: A broad-spectrum SPF 30 or higher for daytime protection against UV damage
- Exfoliant (optional): A chemical or physical exfoliator used 2-3 times weekly to remove dead skin cells
- Treatment serum (optional): A targeted product for specific concerns like dryness or uneven texture
Those first three products, cleanser, moisturizer, and sunscreen, form the foundation that dermatologists recommend for everyone. Everything else is extra credit.
When shopping, look for products labeled for your skin type if you know it, but “for all skin types” or “gentle” formulas work well for most beginners. Fragrance-free options tend to be less irritating, especially in winter when skin runs more sensitive. You don’t need to spend a fortune either. Plenty of drugstore brands offer effective formulas that rival luxury options.
Start with the essentials and use them consistently for at least a month. Once you’ve established that habit and understand how your skin responds, you can consider adding an exfoliant or treatment serum. But resist the urge to buy everything at once. Your skin needs time to adjust, and you need time to figure out what actually works for you. Three good products used regularly will always outperform ten products sitting unused in your cabinet.
Know Before You Start: Safety and Skin Considerations
Before diving into your new routine, a few crucial safety steps will protect your skin and help you avoid common beginner mistakes.
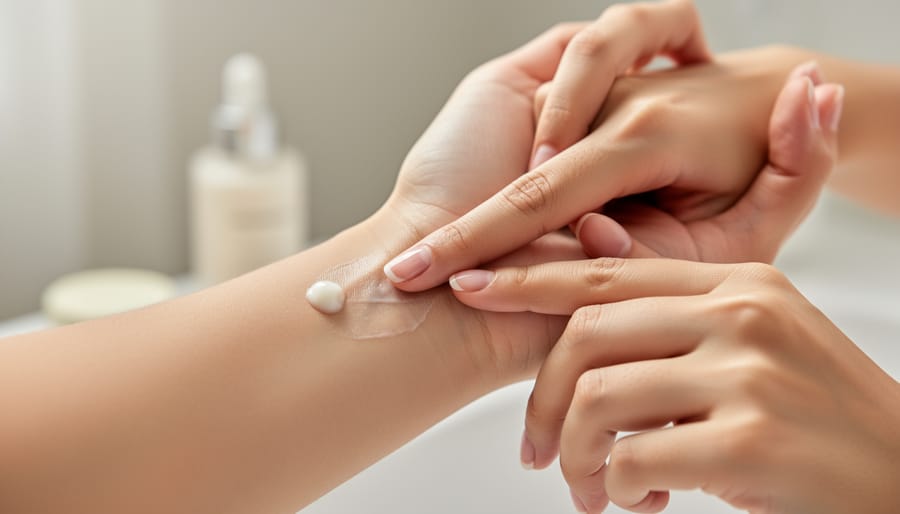
The single most important habit is to patch test every new product before applying it to your entire face. The American Academy of Dermatology recommends you test products on skin by applying a small amount to your inner forearm or behind your ear, waiting 24 hours, and checking for redness, itching, or swelling. This simple precaution catches potential allergic reactions before they affect your face.
Understanding your basic skin type matters less than you might think when starting out, but knowing whether your skin tends toward oily, dry, combination, or sensitive helps you choose appropriate products. Winter complicates this because even naturally oily skin can feel tight and dehydrated in cold weather, while dry types may experience flaking or redness they don’t see in summer. Your skin’s winter behavior is temporary, so adjust products seasonally rather than assuming your type has permanently changed.
Watch for signs your routine isn’t working: persistent stinging or burning, increased breakouts after two weeks, excessive dryness or oiliness, or visible irritation. Mild tingling from certain active ingredients is normal, but genuine discomfort means stop using that product immediately. Just as you’d protect your hair with a heat protectant before styling, treat your skin barrier gently during winter when it’s naturally more vulnerable.
Consult a dermatologist if over-the-counter products cause severe reactions, your concerns don’t improve after six weeks of consistent use, or you’re dealing with painful acne, suspicious moles, or persistent rashes that home care can’t resolve.
Your Step-by-Step Morning and Night Routine
Step 1: Cleanse Your Skin
Start with a gentle cleanser that matches your skin type. If you’re dry or sensitive, choose a creamy or oil-based formula. Oily or combination skin types do better with gel or foaming cleansers. I learned this the hard way after using a harsh foaming wash that left my face tight and uncomfortable for weeks.
Wash your face twice daily: once in the morning to remove overnight oil buildup, and again at night to clear away makeup, sunscreen, and the day’s grime. Wet your face with lukewarm water (not hot, which strips natural oils), massage a pea-sized amount of cleanser in gentle circular motions for 30-60 seconds, then rinse thoroughly. Pat dry with a clean towel rather than rubbing.
The key is being gentle. Your cleanser shouldn’t leave your skin squeaky-clean or tight. That stripped feeling means you’ve removed too much of your skin’s protective barrier, which is especially problematic in winter when your skin already faces harsh conditions.
Step 2: Exfoliate (2-3 Times Weekly)
Unlike cleansing, exfoliation isn’t a daily step. Start with twice a week, ideally in the evening after cleansing, and increase to three times if your skin tolerates it well. This removes dead skin cells that make your complexion look dull, especially during winter when cell turnover slows.
You’ll choose between two types: physical exfoliants use tiny grains to manually buff away dead skin, while chemical exfoliants like AHAs and BHAs dissolve the bonds holding dead cells. Chemical options are gentler and more effective for most beginners, though they sound intimidating.
I learned this the hard way after scrubbing my face with a grainy scrub every single night, wondering why my skin looked angry and felt tight. My skin barrier was wrecked within two weeks.
Apply a thin layer to clean, dry skin, wait the recommended time if using a treatment, then rinse or move to your next step depending on the product type. Skip exfoliation on nights you notice any redness or irritation.
Step 3: Tone (Optional)
Toners used to be all about stripping your skin with alcohol, but modern formulas are completely different. Today’s toners hydrate, balance your skin’s pH after cleansing, and prep it to absorb the products that follow. Think of them as a bonus step that can enhance your routine, but they’re not essential when you’re just starting out.
You’ll benefit most from a toner if you have oily skin, live in a humid climate, or want an extra layer of hydration. If your skin feels tight after cleansing or you’re battling dullness, a hydrating toner can help. I skipped toners entirely for my first year of skincare and my routine worked fine, but adding one later made my serums absorb better.
To apply, pour a small amount onto a cotton pad and gently sweep it across your face, or pat it directly into your skin with clean hands. The patting method wastes less product and feels more luxurious. Use it right after cleansing, while your skin is still slightly damp.
Step 4: Treat Specific Concerns (Optional)
This is where you tackle your main skin concerns, and honestly, it’s tempting to go overboard here when you’re first starting out. Serums and treatments deliver concentrated active ingredients to address specific issues like dryness, dullness, or uneven texture. In winter, a hydrating serum with hyaluronic acid can be a game-changer for moisture-starved skin, while vitamin C helps brighten that flat, grey complexion cold weather often brings.
Here’s what I wish someone had told me: you don’t need five different serums. Pick one concern to address initially. Apply your treatment after cleansing (and toning, if you use it) but before moisturizer. Use a few drops, pat gently into skin, and wait 30 seconds before moving to the next step. Start with products designed for beginners rather than high-strength formulas, and introduce only one new treatment at a time so you can identify what’s actually helping your skin.
Step 5: Moisturize
Moisturizer seals everything in and keeps your skin hydrated throughout the day or night. This step is absolutely crucial in winter when cold air outside and dry heating indoors strip moisture from your skin constantly.
For beginners, I recommend starting with a simple, fragrance-free moisturizer suited to your skin type. If your skin feels tight after cleansing, you need more hydration. Oily skin still needs moisturizer, just choose a lightweight, gel-based formula. Dry or combination skin benefits from creamier textures, especially during colder months.
Application is straightforward: take a pea-sized amount and warm it between your fingers, then gently press it into your face and neck using upward motions. Don’t rub aggressively. Apply while your skin is still slightly damp from cleansing to lock in moisture.
In winter, you might need a richer formula than you’d use in summer. I switch to thicker creams when the temperature drops, and I’ll sometimes layer a dry skin mask once weekly for extra hydration. Pay attention to how your skin feels an hour after moisturizing, if it’s still tight or flaky, you need something heavier.
Morning Addition: Apply Sunscreen
Sunscreen isn’t optional just because it’s cold outside. UV rays penetrate clouds and reflect off snow, meaning your skin needs protection year-round. I learned this the hard way after a winter ski trip left me with unexpected sun damage despite the freezing temperatures.
Apply sunscreen daily as the final step in your morning routine, after moisturizer has absorbed for about 30 seconds. Use a nickel-sized amount for your face and neck, applying it in dots across your forehead, cheeks, nose, and chin before blending outward. Don’t rub it in like lotion; pat and press gently to avoid disrupting the products underneath.
Look for broad-spectrum SPF 30 or higher that protects against both UVA and UVB rays. Mineral sunscreens with zinc oxide or titanium dioxide work well for sensitive winter skin, while chemical formulas tend to feel lighter under makeup. Check out our daily SPF guide for beginner-friendly options that won’t leave a white cast or greasy feel.
Winter-Specific Adjustments for Beginners
Cold weather threw me for a loop during my first winter with a new routine, my skin went from “finally improving” to tight, flaky, and uncomfortable in a matter of weeks. I learned the hard way that winter demands a few simple tweaks to keep your routine working.
The biggest change you’ll need is swapping lightweight moisturizers for richer, more emollient formulas. When temperatures drop and indoor heating runs constantly, your skin barrier loses moisture faster than it can replenish. Look for moisturizers with ceramides, hyaluronic acid, or shea butter, ingredients that lock in hydration rather than just sitting on the surface. If your current moisturizer feels like it absorbs and disappears within an hour, it’s probably not enough for winter conditions.
Resist the urge to cleanse more often when your skin feels dry or tight. I made this mistake, thinking extra washing would help, but it actually stripped away the protective oils my skin desperately needed. Stick to cleansing once in the evening and just rinsing with lukewarm water in the morning. If you must cleanse twice daily, use a cream or oil-based formula rather than foaming cleansers, which tend to be more drying.
Indoor heating creates a double challenge, it dries out the air while you’re inside for longer periods. Consider these adjustments:
- Switch from gel or lotion moisturizers to cream or balm textures
- Continue daily sunscreen application (UV rays penetrate clouds and reflect off snow)
- Run a humidifier in your bedroom to add moisture back into the air
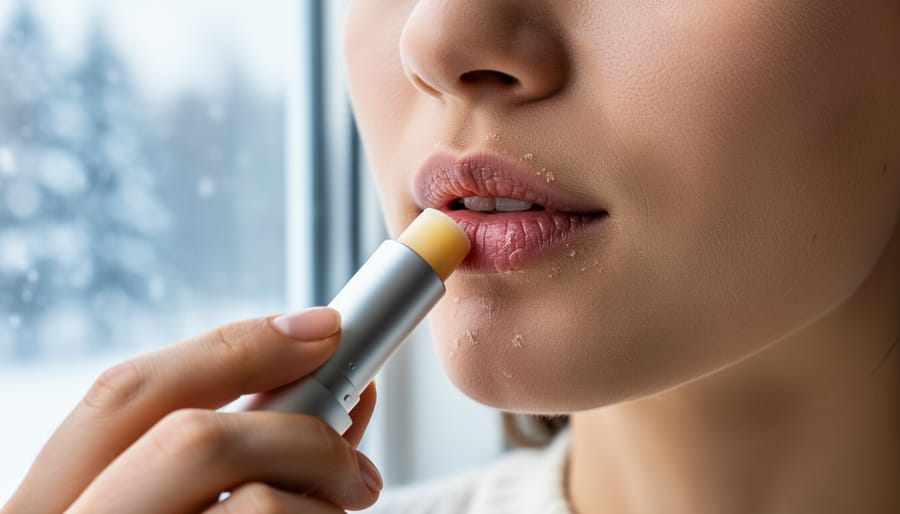
- Apply lip balm and hand cream throughout the day, not just after your routine
Pay attention to how your skin feels after each step. If cleansing leaves you feeling stripped or uncomfortable, that’s your barrier telling you to pull back. The winter skincare tips that made the biggest difference for me were simple: gentler cleansing, thicker moisturizer, and accepting that my skin needed more recovery time between active treatments during cold months.
How to Know If Your Routine Is Working
Your skin won’t transform overnight, and that’s completely normal. Most skincare products need at least four to six weeks of consistent use before you’ll see noticeable improvements. I made the mistake early on of switching products every two weeks because I didn’t see instant results, which only confused my skin and delayed real progress.
Watch for these positive signs: your skin feels more comfortable throughout the day, dry patches soften or disappear, your complexion looks more even, and makeup applies more smoothly. In winter especially, if your skin stops feeling tight after cleansing, that’s progress. Take photos in the same lighting weekly to track changes you might not notice day-to-day.
Common beginner mistakes include over-exfoliating (leading to redness and sensitivity), using too many new products at once (making it impossible to identify what helps or hurts), and giving up too soon. If you experience increased dryness, scale back to just cleanser and moisturizer for a few days. If breakouts worsen after two weeks, one of your products might be clogging pores, so remove them one at a time to identify the culprit.
Adjust your routine when seasons change, when your skin consistently feels uncomfortable, or when specific concerns persist beyond eight weeks. Listen to your skin, it tells you what it needs if you pay attention.
Common Questions About Starting Your First Routine
Starting a skincare routine can feel daunting, and I remember staring at endless product aisles wondering if I needed to take out a second mortgage just to wash my face properly. Here are the questions I wish someone had answered when I was beginning.
How much should I spend on my first skincare routine?
You can build an effective starter routine for under $50 total. Drugstore brands often use the same active ingredients as luxury products, just with simpler packaging and marketing.
Are expensive products really better than affordable ones?
Not necessarily. Price often reflects packaging, branding, and marketing rather than effectiveness. The key is finding products with proven ingredients that work for your skin type, regardless of the price tag.
What if my skin gets worse after starting a new routine?
Some purging is normal with certain active ingredients, but if you experience painful irritation, burning, or worsening breakouts after two weeks, stop using the new products and simplify back to just cleanser and moisturizer. Introduce products one at a time to identify culprits.
I’m overwhelmed, how can I simplify this?
Start with just three products: a gentle cleanser, a moisturizer, and a sunscreen for morning use. Master this foundation for a month before adding anything else.
Does my routine need to change based on my age or gender?
The basic steps remain the same regardless of age or gender. What changes are specific concerns (like targeting fine lines or managing beard area skin) and choosing products formulated for those needs, not the fundamental routine structure.
Can I skip steps if I’m in a rush?
The absolute minimum is cleanser and moisturizer at night, plus sunscreen in the morning. Everything else is bonus, so on hectic days, stick to these essentials rather than skipping entirely.
The biggest mistake I made early on was thinking I needed every product I saw recommended online. I built a bathroom shelf that looked like a cosmetics counter but had no idea what half the bottles actually did. Starting small isn’t settling for less, it’s being strategic. You’ll learn what your skin actually needs through experience, not by guessing in the store.

Tools and materials
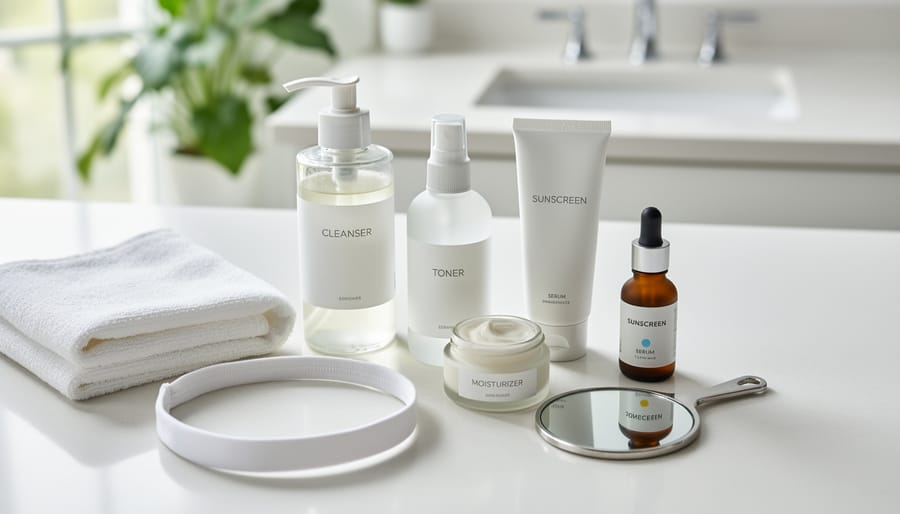
Starting a skincare routine requires surprisingly few items. You don’t need a bathroom counter full of expensive products to see real results. For beginners, focus on three core essentials: a gentle cleanser suited to your skin type, a moisturizer that feels comfortable on your face, and a broad-spectrum sunscreen with at least SPF 30 for daytime protection. These three products form the foundation of any effective routine.
Beyond the basics, you might want a soft washcloth or your clean hands for cleansing (no need for fancy tools), and clean cotton pads if you later add a toner. When I started out, I bought exfoliating brushes, jade rollers, and serums I didn’t understand, thinking more was better. It overwhelmed me and irritated my skin.
If you want to expand after mastering the essentials, add a chemical exfoliant two to three times weekly and perhaps a targeted treatment serum for specific concerns like dryness or uneven texture. Start simple, though. Your skin will thank you for the restraint, especially during winter when less is often more.
Step-by-step process
The process boils down to building two simple routines: one for morning, one for night. Start with the absolute basics and add complexity only when you’re comfortable.
Morning routine:
1. Cleanse with lukewarm water and a gentle cleanser, massaging for 30-60 seconds
2. Pat skin dry with a clean towel
3. Apply moisturizer while skin is still slightly damp
4. Finish with sunscreen as your final step, using about a nickel-sized amount for your face
Evening routine:
1. Cleanse to remove the day’s buildup, spending extra time if you wore makeup or sunscreen
2. Exfoliate 2-3 times weekly after cleansing (skip this step on other nights)
3. Apply any treatment products to specific concerns if needed
4. Seal everything with moisturizer
The order matters because products work from thinnest to thickest consistency. Water-based products like toners go first, then treatments, then creams. Sunscreen always goes last in the morning because it needs to form a protective film.
Give each product 30-60 seconds to absorb before layering the next one. Your entire routine shouldn’t take more than five minutes once you’ve got the rhythm down.
verification
Give your new routine at least four to six weeks before deciding whether it’s working. Your skin needs time to adjust to new products and complete its natural renewal cycle, which takes about 28 days for most adults.
Check for these positive signs: your skin feels comfortable throughout the day without excessive tightness or oiliness, makeup applies more smoothly if you wear it, and any initial flakiness or dryness has improved. Take photos in the same lighting every two weeks to track subtle changes you might not notice day-to-day.
If you’re experiencing persistent irritation, increased breakouts beyond the first week, or worsening dryness after a month, something needs adjusting. This doesn’t mean your routine has failed, it means you need to troubleshoot. Common fixes include switching to a gentler cleanser, using less exfoliant, or choosing a richer moisturizer, especially during winter months.
Keep notes about what you’re using and how your skin responds. I started a simple spreadsheet when I began my routine, noting any changes or reactions. This made it easy to identify which product helped and which didn’t suit my skin. Trust the process, stay consistent, and remember that healthy skin is a marathon, not a sprint.
You don’t need a dozen products or a complicated routine to see real results. Start with the three essentials, cleanser, moisturizer, and SPF in the morning, then cleanser and moisturizer at night, and you’ll be doing more for your skin than most people who own fifty bottles.
I wasted months overthinking which serum to add and whether I needed a special eye cream before I realized my skin was already improving from just washing my face properly and keeping it hydrated. The fancy extras can come later, once you’ve built the habit and figured out what your skin actually needs.
Consistency beats perfection every time. You’ll miss days, forget sunscreen occasionally, or fall asleep without cleansing after a long night. That’s fine. What matters is showing up for your skin most of the time, not getting it right every single day.
Give your new routine at least six weeks before you judge whether it’s working. Your skin didn’t develop its current concerns overnight, and it won’t transform that quickly either. Be patient with the process and with yourself. Healthy skin is a journey, not a destination, and you’ve already taken the most important step by starting.